Category Archives: Uncategorized

Burda Moden July 1965

image

The cover dress has a darted bodice and a circle skirt.

image

This dress has buttons going partway down the front with looped buttonholes.  The front pleat is cute.

image

For the beach or lounging by the pool

image

There’s the cover dress, a pretty sundress, and a shirt dress with a pleated skirt.

image

I like the the dress over the shorts–great for bike riding!

image

Love the double breasted blouse with the wrap skirt.

In the vintage Burda magazines most of the styles were only printed in one size, although there seems to be one style per issue a the range of  about 4 regular sizes.  A few other styles may be available in a couple sizes, like some of these plus styles

image

image

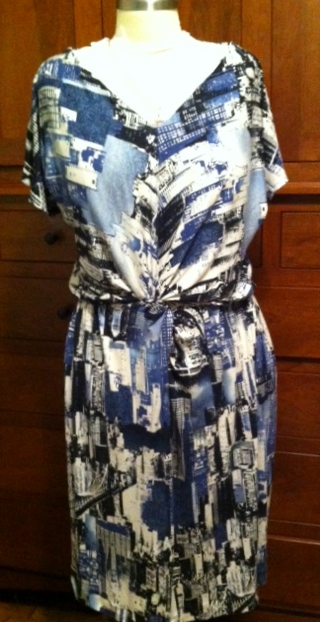
The wrap dress in the top picture and the shirt dress with the scalloped collar are my favorites in the plus section.

There are patterns for a range of girls sizes in the children’s section.  But only a couple things for boys.

image

image

I wish Burda would still have styles for little kids through teens each issue instead of focusing on just one small size range (usually under size 122)

Lots of knitting patterns for women and kidsimage

Even if I were a better knitter, the language barrier would hinder me too much with the knitting patterns

There are several articles I can’t read and then….

image

Maternity!

vintage maternity tends toward the tent like,

but the dress on the far left isn’t bad (sans bow)

this issue had many pages focused on baby products and some cut baby knitting projects.

There was an article about cacti (at least the photos were of cacti)

and then the recipes.  This month’s food featured a lot of

image

Gelatine!

so not appetizing.

The sizing is different than modern Burda too.

this is my favorite issue of the three.

Next:  August 1966

Four Seasons Kimono Jacket

image

Hot off the sewing machine:  Hot Patterns 1157 Fast & Fabulous Four Seasons Jacket

I am wearing it now in fact and it’s keeping me quite cozy on this dark and damp winter’s day.  I am all ready to curl up with a book and a cup of cardamom tea ….if only I could!

The HotPatterns crew has a tutorial video on You Tube for this top, which I recommend watching before making the jacket as here are some nice tips to help with construction.

This is a pretty simple style, wrap front jacket with short kimono sleeves, darts in front and back, front pockets,  and a belt.  The pattern calls for finishing the seam allowances with bias binding, which is what I did, but you don’t have to do that and instead could use a serger, although the result won’t be as pretty on the inside of the jacket.  The jacket would be quicker to make.  By far the most time consuming part of constructing my jacket was making and attaching the seam binding.

Of course you could use purchased bias tape, but making your own isn’t hard.  First you need to cut bias strips 4 times as wide as what the finished binding width should be.  If you are using a bias tape maker you cut the width of the strips to whatever size your maker needs.  I used one of my Clover bias tape makers, which is a super fast and easy way to make the tape:

image

It folds the strips and you just press with an iron.  Of course if you don’t have a bias tape maker, all is not lost.  I fold my strips in half to find the midline and the press each edge toward the midline.  Like so:

image

imageC

Purchased bias tape generally has one  folded side that’s slightly larger than the other.  You can do that with your handmade bias tape if you like.  I don’t sweat it too much.

The pattern has a specific sequence of seams to apply the binding to.  There is not much detail about how to actually apply the binding, although the You Tube video does show how to do it.  I took some photos that may also help if you haven’t applied bias binding before.

1.  Open one folded edge of your biding and pin it to the fabric edge and stitch along the foldline

image

2.  Fold binding over the edge to the other side of the fabric.  I like to press it in place and, if you have them, wonder clips work well here.  You can also use pins. I used some bee clips (for paper) here too as I didn’t have enough wonder clips.

image

3.  Sew into place

image

Voila!

image

When the seam is sewn and pressed it looks like so:

image

The inside of the jacket when finished looks like this:image

I used a finer wale corduroy, but the pattern suggests nearly any blouse or jacket weight fabric will work–even leather and fleece!  I can see making this in something lightweight for summer to wear over a tank or cami.

Happy New Year!

Another knit dress . . .

I have had a few days with more time to sew so I made another knit dress, this time from a pattern from an old issue of Burda World of Fashion (February 2005), before the magazine became BurdaStyle. The original pattern called for a stripe to be cut on the bias for the skirt panels so there would be a chevron effect. This is what I first planned for this dress: solid black bodice with a gray and black striped skirt. But my striped knit was a bit too sheer and I didn’t want to line it and weight down the dress so I ended up switching to a print. I didn’t need the skirt panels to be on the bias anymore, so I redrew the grainline to the center of the panel. Worked out great. I did slightly raise the v-neck as well.

Image

Hotpatterns 1138

Hotpatterns 1138


; I made this dress from Hotpatterns 1138: Metropolitan Verano Dress and Top. I am not yet in love with this dress . . . I am sure I will wear it and maybe I’ll like it better after I’ve spent some time with it … The first strike against the dress is it’s color. I like the print, but it’s a bit more blue than I thought it was when I ordered it. The second strike is that the waist of the dress doesn’t hit me exactly at my waist–it’s a little lower. The pattern piece seemed okay when I held it up to me, but with a stretchy knit, things sometimes stretch out a bit when sewn. I should have basted and adjusted the waist as I sewed the dress. I took in the side seams of the bodice of the dress considerably–inches in fact to make the dress more fitted. It’s supposed to be “a slouchy, semi fitted silhouette” according to the pattern directions, which is what it is now I’ve taken it in. Before the adjustments I would have considered it oversized and nearly unfitted. I am not sure if it was the stretchiness of my fabric or that there was too much ease (for me) in the pattern but it made me look as if I were a child wearing an adult’s dress. It’s much better now. This is a style that a FBA would probably not be necessary for most people.

Ottobre Design skirt in knit tulle

20111228-153810.jpg

This skirt is from the Autumn 2011 issue of Ottobre Design. The design is called “Butterfly Wing” and is for older girls (sizes 128-170). The original skirt in the magazine was made from soft mesh tulle, with ribbing for the waistband and batiste for the under portion of the skirt. I used a knit mesh, sometimes called “knit tulle” for the ruffles and a rayon lycra jersey for the under skirt. My girl isn’t into anything ‘girly’ anymore, but she will wear this skirt, usually with solid colored leggings and a Woot shirt, but she must have been feeling more festive the day I took the picture as she had on striped tights, which went surprisingly well with the skirt. I think the muted colors of the skirt appeal to her. I have been giving away all fabrics that seem too juvenile for a girl her age. It’s sad to let some of them go, as I had projects in mind for them, but maybe some other mother will find use for them.

Image

Ottobre Woman Spring/Summer 2010 view 11 “Journal”

20111220-130520.jpg

vintage dress clips

I just finished sewing this dress from the January 2011 Burda Style magazine, which is one of my favorite issues of the past 6 months:

I did raise the neckline considerably, as it was quite plunging and not suitable for my workplace.   But the raised square neckline and dark gray of the dress are perfect for vintage dress clips. 

I tried out my pair of silver clips:

then my singleton colorful circle clip:

My kids voted for the colors, to counter the plain grayness of the dress.

I also altered the skirt of the dress to be slightly a-line instead of straight, eliminating the need for the slit in back, and making it more functional for my job.  It’s a nice dress, with front and back princess seams which provide nice shaping.  I used a rayon blend double knit for this project, which was a good choice.  A fairly stable knit is required. 

A simple home-made bento band

A length of ribbon and some elastic makes a simple bento band:

I can’t remember what this piece of rainbow ribbon came with, but it was too short for anything else except a bookmark.  Or, a bento band.  Quite possibly the fastest sewing project I ever did!

Not too cutesy,  but makes me happy to look at it.


Meet Robot Guy . . .


Robot Guy is based on this drawing by my preschooler: 


The designer approved the color change of Robot Guy’s head, although we had differences of opinion about what Robot Guy should be. 

The designer wanted Robot Guy to be a toy.  I wanted him to decorate a bento band.   Neither side would give in so . . . add a button and a buttonhole 


and voila, a toy that can be attached to a bento band!  Here he is in bento band mode: 


I made this bento band just like a headband.  I cut a rectangle of corduroy my desired length, and three inches wide (for a finished width of one inch, with 1/2 ” seam allowances).  I folded the rectangle in half lengthwise, right sides together,  and sewed the long edge.  I trimmed my seam allowances and turned right side out.  I pressed so the seam ran up the middle of the back of the band.   After determining how big I needed the band, I cut the elastic and tucked the ends into the fabric portion, folding the raw edges of fabric in as well, and stitched.   I made a button hole in the middle of the fabric portion. 

Robot Guy is entirely made from wool felt and stuffed with wool.  He is hand sewn, except for the seam between the head and body, which I machine sewed.  I used fabric markers for his face and chest controls, which I heat set with an iron.  I then sewed on a clear button to his back. 

Part toy, part bento robot!  And the designer and I are both happy. 


Gotta catch . . .er . . eat them all?


In an episode of guilt driven insanity, I decided to make these fancy cupcakes for my preschooler to take to school on his birthday.  He is wild about Pokemon cards right now.  They weren’t terribly difficult, but they were very time-consuming and I will never, ever, ever spend so much time decorating cupcakes again!  From now on it’s a smear of icing and some colored sprinkles!  

Instead of icing or prepackaged fondant, I made marshmallow fondant which is much tastier than regular fondant. 

They were very well received by my little guy and his classmates, but they were starting to melt in the heat of the classroom.  Some of the faces slid off and had to be set back in place. 

In case anyone is interested:  The green guys are Carnivine, the yellow guys are  Pikachu, The white and blue squirrel looking things are Pachirisu, and the penguins on the bottom are Piplup